What is CSS
CSS is a programming language that is used in web development. It tells the browser how each HTML element on the website is supposed look. It used to style the text, images and everything else on the website. You can build a very nice looking and advanced website using nothing but CSS and HTML5.
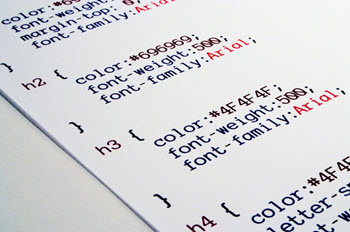
CSS is an abbreviation of Cascading Style Sheets.
Which websites use CSS
Almost all websites use CSS. It is possible to build a website and define the look of each element directly in the HTML but CSS is a much more elegant way to do it. CSS also gives you a lot better control and a lot more options than those you can use if you use nothing but HTML.
You might encounter very old websites that do not use CSS but 99.9% of all new website does and you should always use CSS if you are building a new website.
Why you should use CSS
 CSS gives you better control over the look and feel of the website then any other available option. It allows you complete freedom to style the entire website exactly as you want it. You can create general rules that applies to all elements on the website as well as unique rules that apply only to a single element.
It is a much more elegant and effective solution than styling directly in HTML. If you style the elements directly in the HTML code then you will need to specify the styling for each element. This will result in a larger file size than if you use CSS and general styling rules.
CSS makes it easy to build mobile friendly websites that style the website differently depending on the screen size of the device the website is being used on. This allows you to build a website that looks equally good on a mobile device as it does on a desktop computer. By not building a mobile friendly website you will lose out on a large potential customer group. More then half of all web browsing is done through mobile devices.
CSS allows for better SEO
CSS allow you to create a more streamlined more elegant website without unnecessary code. This helps you rank better in search engines such as Google since all search engines want your website to respond and render as quickly as possible. This improves the user experience.
In a case study this trading website saw a 35% increase in traffic after implementing a clean CSS based design. Other websites i have helped have seen similar or even larger increases in visitor numbers after adapting CSS based designs.
One or several CSS filer?
 A common question is whether you should place all your code in a single CSS file or if you should divide your CSS code over several documents. The answer to this questions depends on who you are asking. A lot of developers would say that it is better to divide it into several documents to make it easier to find and edit code. You place all code related to a certain function in a certain file.
If you ask a SEO (Search engine optimizer) then they would say that should combine everything into a single file. You should minimize the number of resources that has to load before the website can render. If you have several CSS files then you increase the number of files that the website needs to render.
If you ask me than I will tell you that you should prioritize the user experience above everything else. This means that you should place all CSS code in one single document to minimize the time it takes for the website to load. You should make it easy for the visitor. Not for yourself or the developer. If you need to spend a little more time to find the code you want to edit then that is a small price to pay if it improves the visitor experience.
There is one exception from this rule. If you have code that is only needed on one or a low number of pages then you should place the CSS rules for these elements in a separate CSS file that is only loaded on the pages where they are needed. There is no reason that all visitors should be forced to download the code that is only needed on one page. This is especially true if the CSS rules needed for this one page add a considerable amount of code to the CSS file. (more then a couple of kbs). Keep all rules that are need on all or near all pages in a single universal CSS file.
Should you inline CSS or put it in a separate document.
The answer to this question depends on how many pages on your website you think your visitors will visit. If you think that your visitors will visit only one page or if you think they will come directly to your money page where you hope they will perform a certain action then you should inline the CSS. In-lining the CSS will allow for that page to load and render faster. This will improve user experience and maximize the chance that the visitor will perform the desired action.
If you have a website where you think the visitor will spend a lot of time browsing different articles then you should not inline the CSS. If you think that the visitor will visit several pages then you will reduce the experience by in-lining the CSS. This is due to the fact that if you visit only one page than it increase speed to inline the CSS. This is not the case for subsequent pages. If you chose to have the CSS in a separate file then the browser will have that file cached once it loaded the first page. It does not need to request it nor download it for subsequent pages on your website. This allows subsequent pages to load quicker if the CSS is in a separate file.
- In-lining the CSS allows a page to load faster but also requires the CSS rules to be downloaded with each and every individual page.
- Keeping CSS in an individual file makes the initial load time slightly slower but means that you do not have to download the CSS when browsing additional pages